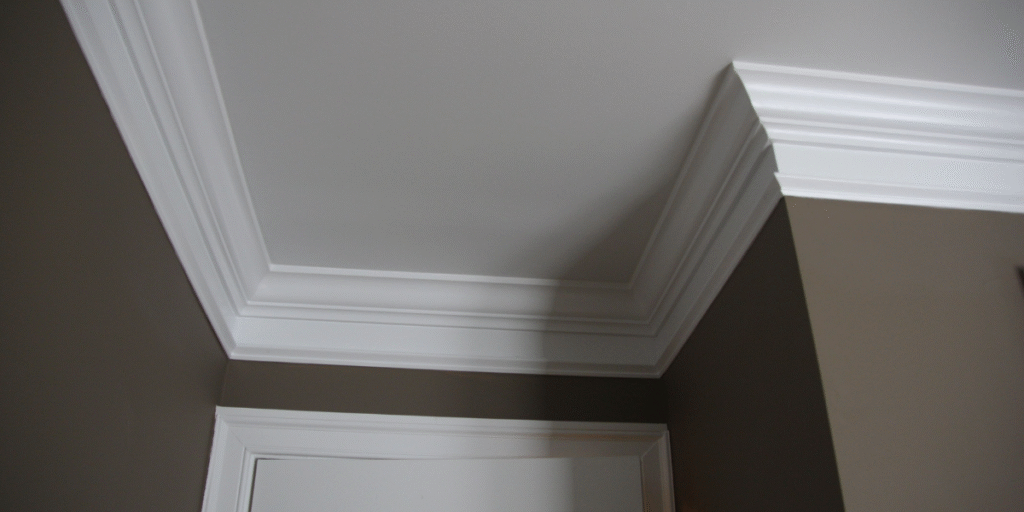
Understanding How Crown Molding Sits on Your Walls
Crown molding connects the wall and ceiling in a position that creates a sprung angle. This angle affects every measurement during installation. Many beginners face gaps because they overlook changes in wall shapes. Careful orientation helps you guide each cut with greater accuracy. A clear understanding of placement supports smooth crown molding corners trim work in every room.
Why Spring Angle Matters in Crown Molding Corner Angles
The spring angle controls how the molding rests on both surfaces. Common profiles include forty-five- and fifty-two-degree spring angles. Each profile demands different miter and bevel settings during cutting. You must check the angle before making any adjustments. Correct identification reduces confusion during crown molding corner installation.
Crown Molding Inside Corners Explained
Inside corners form an inward shape where two walls meet. These corners often reveal uneven surfaces that cause small gaps. Many professionals choose miter cuts, while others prefer coping crown molding. Both methods work well when the measurements remain accurate. Good preparation helps you form perfect crown molding inside corners.
How to Cut Crown Molding Corners for Inside Angles
You can cut inside corners by placing the molding upside down. The bottom decorative edge should rest against the saw fence. This orientation mimics the final installed position. A forty-five-degree miter cut usually forms the basic joint. The bottom edge always becomes longer after this cut.
Best Way to Cut Inside Corners on Crown Molding
Coped joints offer a reliable method for rooms with uneven walls. You cut a simple miter to reveal the profile on the molding. A coping saw then shapes the profile to fit the adjoining piece. This method hides small wall flaws that appear behind the trim. Many carpenters trust coping for tight crown molding joints.
Inside Corner Cutting Methods and Results
| Method | Tools Needed | Best For | Joint Quality |
| Standard Miter | Miter saw | Square walls | Clean but less flexible |
| Coped Joint | Miter saw and coping saw | Uneven walls | Very tight and forgiving |
| Hand Cut | Hand saw and angle guide | Limited tools | Fair but slow |
Crown Molding Outside Corners and Their Challenges
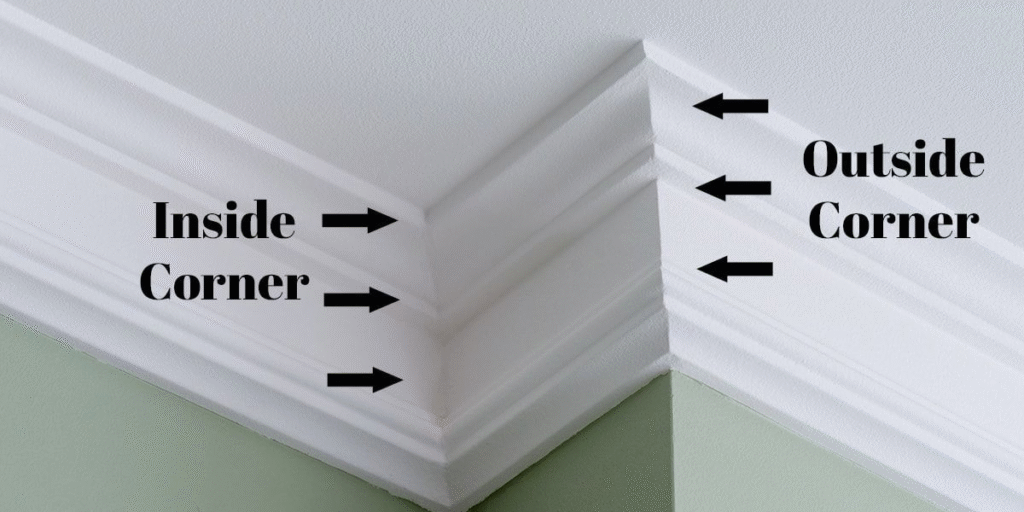
Outside corners project outward and reveal every small error. These corners need special care because each angle is visible. The top edge becomes shorter after a correct outside cut. Many builders practice on scrap pieces before cutting final boards. This habit helps reduce crown molding corner problems during work.
Crown Molding Outside Corner Cutting Guide
Hold the molding upside down and keep the decorative edge against the fence. Set the miter saw at forty-five degrees for basic outside joints. Save the correct end that matches the direction of the corner. Light pressure during cutting prevents unwanted movement of your piece. Good stability produces strong crown molding outside corners.
Vertically Nested Method for Cutting Crown Molding
The vertically nested method places the molding upright against the tall fence. This position matches the installed angle on the wall and ceiling. You only adjust the miter angle because the bevel stays at zero. Many users prefer this method due to its strong consistency. It works well for both inside and outside corners.
When Vertically Nested Cutting Works Best
Vertically nested cutting helps beginners who want a visual match. The molding shows its spring angle clearly during this setup. Each corner forms predictably when the piece stays stable. This method avoids the confusion that appears with flat cutting. It becomes a reliable approach for cutting crown molding corners quickly.
Compound Miter Method for Flat Cutting
Flat cutting requires the molding to rest on its wide back surface. You must adjust both miter and bevel angles during each cut. Standard fifty-two and thirty-eight degree molding uses precise settings. A common setup includes a miter angle near thirty-one degrees. A bevel angle of thirty-three degrees completes the compound cut.
Standard Compound Miter Settings
| Crown Profile | Corner Type | Miter Angle | Bevel Angle |
| 52 and 38 Spring Angle | Inside | 31.62 Right | 33.85 Left |
| 52 and 38 Spring Angle | Outside | 31.62 Left | 33.85 Right |
| 45 and 45 Spring Angle | Inside | 35.26 Right | 30 Left |
| 45 and 45 Spring Angle | Outside | 35.26 Left | 30 Right |
Why Some Users Prefer Flat Cutting
Flat cutting supports wide molding pieces that cannot stand vertically. It gives detailed control when forming complex cathedral ceiling corners. Many professionals prefer this method for large projects. It handles changes in room angles with greater flexibility. Practice on scrap material helps improve accuracy with compound cuts.
Crown Molding Corners Blocks for Fast Installation
Corner blocks remove the need for angle cuts entirely. These decorative pieces sit at each inside or outside corner. The molding only needs straight ninety-degree cuts to fit between blocks. This method works well for beginners or DIY users. Many stores offer crown molding corner pieces that match various profiles.
Where Crown Molding Corners Blocks Work Best
Corner blocks help when walls are uneven or hard to measure. They also work well in homes with unique wall shapes. Straight cuts reduce waste because errors rarely appear. New users appreciate this option because it avoids angle confusion. The final look still appears clean and attractive.
How to Measure Crown Molding for Corners
Accurate measurement forms the foundation of perfect crown molding corners. You must measure the long point and the short point for each joint. Inside corners hold longer bottom edges, while outside corners reverse that pattern. Marking these changes helps you avoid wrong orientations during cutting. Small habits reduce mistakes and lower overall waste.
Steps for Measuring Crown Molding Corners
- Place the molding in the same orientation used during cutting.
- Mark the long point and short point on each board.
- Label inside and outside corners before cutting.
- Transfer measurements carefully from the wall to the molding.
- Double-check alignment before making any cut.
Fixing Crown Molding Corners Gaps
Small cracks may appear after installation due to wall movement. You can fill thin lines with paint-grade caulk for a smooth finish. Larger gaps may require a slight recut on the affected end. Light sanding improves contact between the pieces before repainting. These steps restore clean crown molding corners joints.
Common Crown Molding Corners Problems and Solutions
- Small Separation: Caulk hides thin openings around corners.
- Large Gaps: Recutting corrects wrong miter angles.
- Twisting: Incorrect spring angle placement causes rotation.
- Loose Corners: Missed studs create weak support behind the molding.
- Uneven Joints: Inaccurate measurements lead to inconsistent edges.
DIY Crown Molding Corners Installation Tips
Practice on scrap boards before working on final pieces. Label each piece clearly to avoid mixing orientations. Keep your miter saw steady for clean edges on every cut. Study the spring angle on each molding because profiles vary. Careful habits lead to strong and clean crown molding joints.
Baseboard Corners vs Crown Corners
Baseboard corners sit flat on the wall and are easier to cut. Crown molding corners require more skill due to their angled position. The spring angle adds a third surface to manage during cutting. Cathedral ceilings add more complexity to crown molding trim work. Patience and practice help you handle both trim types.
How to Cut Crown Molding Corners Without a Miter Saw
Some users prefer simpler tools for small projects. A fine handsaw and a guide create clean cuts with patience. A stable worktable supports accurate corner shaping. Slow movements help you avoid broken edges during cutting. This method works well when power tools are not available.
Conclusion
Inside and outside corners follow different rules during cutting. Vertically nested cutting offers simple and predictable results for beginners. Compound cutting supports wide pieces and cathedral-shaped rooms. Corner blocks provide fast installation for people who prefer straight cuts. Careful measuring and steady practice create perfect crown molding corners every time.